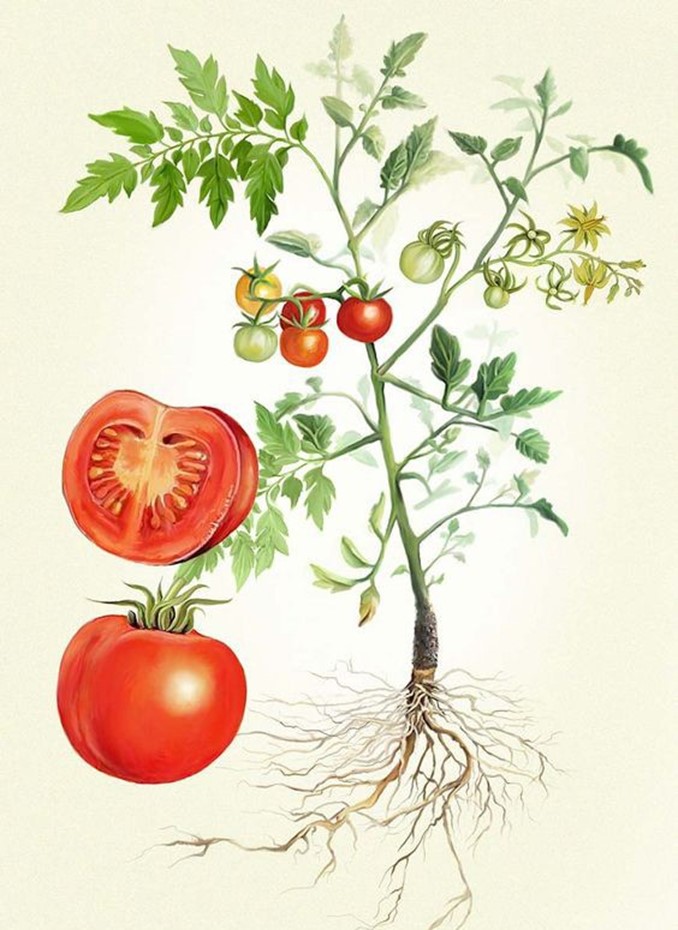
Growing Tomatoes
Fresh, vine ripened flavor is the reason most gardeners grow their own tomato crop – No commercially grown tomato tasted like one grown in the back yard and freshly picked from the vine, rinsed, and eaten on the spot. Tomatoes come in a very wide range of size, color, flavor and texture. The smallest fruits are pop-in-your-mouth small up to 2 pound monsters, and the colors: red, pink, orange, yellow, green, purple, black and mixtures of all. At Anderson’s, we carry all kinds and types of varieties from seed as well as the plants: heirloom, hybrid, grafted and standard. In the same family as eggplant and peppers, their favored weather is warm and warmer – cool days and nights don’t agree with tomatoes, so plant accordingly. They like it when the days are long and hot. If you are limited on space, don’t forget that tomatoes grow very well in containers or raised bed areas and just a handful of plants can keep a family of 4 well stocked for the summer and beyond.
Soil Preparation
Tomatoes prefer a loose, sandy soil, rich in organic matter, well drained, and not too heavy. They also need full sun exposure. Before planting, incorporate 2-3 inches of well composted organic matter and 1-2 lbs of all-purpose fertilizer (we recommend “That’s All it Takes” complete fertilizer) per 100 square feet and work them into the soil to a depth of 4-6 inches. Heavy, clay-based soils must be amended with compost and organic matter to encourage and allow good root development. If you have heavy, clay soils, we recommend 4-6 inches of organic matter and 50 lbs of Utelite or Zeolite per 200 square feet added to the soil each fall for multiple years to increase drainage and nutrient availability. Over time, you can create a better growing environment for your garden plants to thrive in and produce.
Important: If you have had difficulties with Verticillium or Fusarium Will wilt your tomato plants, you can help prevent infection from soil-born diseases by digging a much larger hole 12 x 12 or 16 x 16 inches and filling it with a potting soil high in peat moss. By the time the root system contacts the native soil and potential pathogens of the disease, the plant will already be well established and more capable of fighting off the disease until well after harvest.
Planting
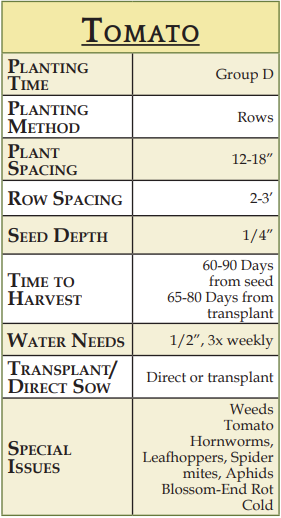
Tomatoes abhor frost and need nighttime temperatures over 65 degrees to blossom and set fruit, so northern Utah growers need to start them indoors around the middle of March to early April. Seeds should be planted ¼ inch deep in a light, seed-starting mix, in whatever container is most convenient for you. Transplant when stalks are strong and are 6 inches tall or greater (generally they are ready to go outside by mid-May).
Be sure to space the seedlings correctly when transplanting, with 24-36” recommended between plants as well as 36” between rows. Tomatoes prefer deep planting. Dig your holes deep enough to bury about 1/2 to 2/3 of the stem. Remove the leaflets that would be covered with soil and roots will form along the buried part of the stem, strengthening the plant and encouraging more root development. Once planted, water the seedlings with Kangaroots root stimulator for quick root development.
Use the Kangaroots every 4-5 days for the first 3 waterings for less transplant shock and to speed up early development. To help protect the plants from late frost, and to increase temperatures around the plant, use hot caps or Wall- 77 o-Water plant protectors over newly planted seedlings until weather permits, or the plants out-grow them. Row covers work well for frost protection and heat generation as well as keeping bugs and other pests (deer) from bothering your new transplants.
Varieties
If you ask 10 gardeners what their favorite tomato is, you will get 10 different answers. There are so many different varieties, and so many different flavors and textures to choose from, it is hard to suggest the BEST variety to anyone. It really depends on what you want from your tomato. Worried about a short season? Our earliest varieties include Early Girl, Early Doll, Jet Set or Jet Setter, Burpee Early Pick, and most of the cherry tomatoes. Canning? It’s still hard to beat Better Boy, Big Beef, and DX-52 (Hamson) for productivity, quality, and size. Making fresh salsa? Roma types are meaty and flavorful to make pico or salsa – try Viva Italia, Optimax (huge, firm fruits), or Andiamo (long and slender San Marzano style). Cherry or grape tomatoes burst with bite-size flavor. We highly recommend Sun Sugar, Sweet Baby Girl, Sweet Million, and Sugar Plum. It’s fun to do a cherry tomato medley with black, red, orange and yellow colored fruits. For delicious acid free flavor grow Pink Girl, Brandy Wine, Cherokee Purple or Brandy Master. It’s fun to try different varieties and types to find the ones you like best. Never hesitate to experiment – you can always grow something different next year if you don’t like it.
Water
Water tomatoes deeply and frequently while trying to maintain even soil moisture. Tomatoes need consistent watering to develop high quality fruits. Use a soaker hose or drip system for uniform water distribution and water lightly every 5-7 days to maintain soil moisture during these essential growth stages.
A light compost mulch can help as well if daytime temperatures start to climb over 80 degrees. Tomatoes grow well in plastic mulch (clear or black) or weed barrier as it helps generate and hold more heat (which they love) and retain more consistent moisture (which they love).
Fertilizer
Apply ¼ cup per plant of “That’s All it Takes” complete fertilizer or Happy Frog Organic Tomato & Vegetable Food 4 weeks after transplanting to encourage and maintain vigorous plant growth and flower production.
Place the fertilizer evenly just to the side of the plants in the row and work it lightly into the soil before watering. Make sure to water it in! For quick bursts of growth and flower production, we recommend using a water soluble fertilizer like Ferti-lome Blooming and Rooting or Seedlinger’s Fertilixer (Organic) once per week for extra productivity. Just mix in water and apply to the leaves as well as the root zone.
Avoid high nitrogen fertilizers that will just promote large plants and little fruit production We also recommend treating your Tomatoes with beneficial microbes and mycorrhizae (Kangaroots or Myke). These added helpers bring nutrients and water directly to the plants that host them, making them stronger, more resistant to insects and diseases, and more drought tolerant. This is especially helpful if you have been fighting diseases and virus that bother tomatoes. Mycorrhizae will actually fight off the diseases that attack the plants from the soil. Don’t go home without them.
Support
Tomato management and harvest will be more satisfying if plants are trained to stay off of the ground. Fruit that lays on the ground will rot, discolor or become damaged from insects. Also, as the fruits develop, they will become heavy and weigh down the plants, sometimes to the point of breaking branches and damaging developing fruits. It is almost essential to cage or trellis the plants to help with ripening, support, and productivity.
There are many different ways to support tomato plants, wire cages being the most common. Look for sturdy cages made from heavier gauge steel and that are shaped like an upside down ice cream cone, wider at the bottom and narrower at the
top. Don’t use cages smaller than 36” and the bigger the better (Mark uses 44” and 54” to hold his plants, and even then, they sometimes aren’t big enough). If you use stakes, make sure they are sturdy, 6 feet tall, and sink it a minimum of 12” into the ground to hold the plant without tipping over. Secure the plants to the stake with soft, stretchy ties – twist ties will cut into the stem over time, damaging the plants.
Common Problems
Keep the weeds to a minimum with the use of plastic and organic mulches. We prefer the Pro 5 weed barrier as it allows water and nutrient to pass through, but stops even the most difficult weeds as they germinate.
Treflan and Corn Gluten weed preventative herbicides are also very effective ways to stop weeds before they start, saving you hours and hours of weeding. Be sure to control weeds when they are small to ensure damage is not done to broccoli root systems when weeds are removed. Also, it is essential to practice crop rotations to discourage pest and disease problems. Make sure to dispose of tomato plants at the end of the season, either in the compost pile or the green waste container, as plants incorporated into the soil can spread diseases to next year’s crop. Aphids, Potato Beetles, Tomato Horn Worm and flea beetles can all pose problems, but quick treatment with Ferti-lome Triple Action or Broad Spectrum Insecticide can bring them under control if treated early.
Blossom-end Rot, Fusarium Wilt, Verticillium Wilt, and Early and Late Blights also plague tomato growers in northern Utah. Calcium supplements, beneficial microbes and mycorrhizae, and general purpose fungicides like Natural Guard Copper Soap or Ferti-lome F-Stop will all help guard against these common problems.
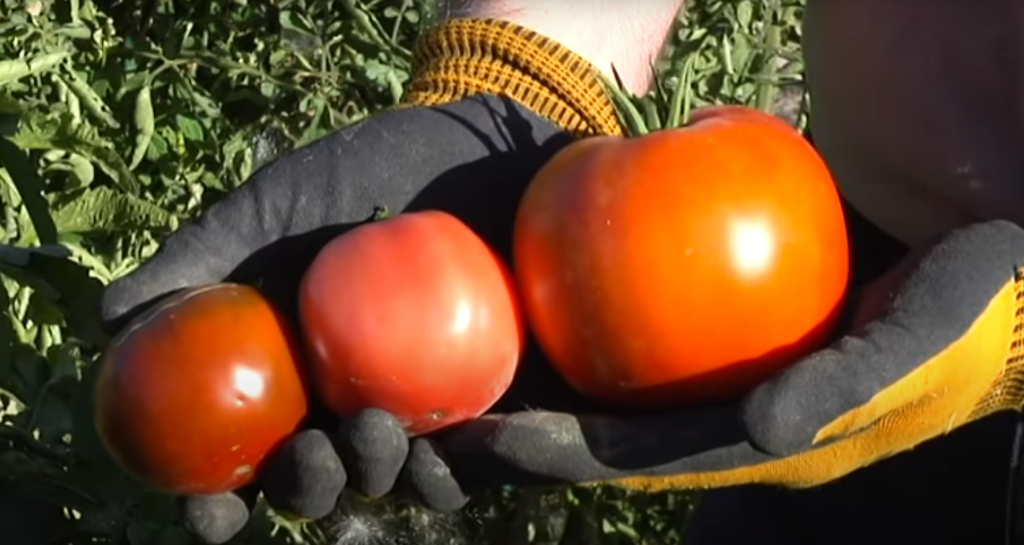
Harvesting
Harvest in mid to late summer, when fruits appear ripe and have developed their mature color. Use a knife or pruner to cut the fruits from the plants to avoid damaging the stem and disrupt the growth of remaining fruits. Tomatoes taste best when picked fully ripe, but at the end of the season, you’ll want to harvest as much fruit as possible before it is damaged by frost. Ripening tomatoes change color from dark green, to light green, then to their mature color. If you harvest the fruits anytime after they have reached the light green stage, they will ripen off of the vine, usually quicker in a sunny windowsill. Some gardeners even pull up the mature plant, fruit and all, and hang it upside down in the garage or storage shed until most of the fruit ripens as the vine dries and dies.