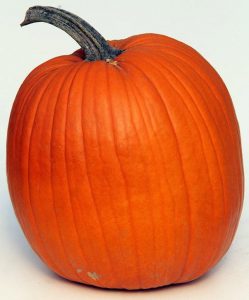
How To Grow Giant Pumpkins

If you asked 10 different pumpkin growers, you would likely receive 10 different answers on how to grow “the big one.” Most of those answers would contain many of the same concepts (fertilizer, soil preparation, protection from the elements, etc.), while differing in method or approach.
The first, and most important step is soil preparation. Pumpkins like a soil pH between 6.5 and 6.8 so a soil test might be a good place to start. Then, add sulfur or lime to adjust the pH accordingly. Next, add as much organic matter as you can get. Pumpkins just love it. Composted manure works best, but peat moss, leaves and grass clippings all make good amendments. A fall-planted cover crop, such as winter rye or vetch, tilled under in early spring would also work wonders.
Start your seeds indoors in six-inch peat pots about four weeks before the last spring frost. Seed selection is of the utmost importance. Atlantic Giant, Big Moon, Big Max, and Prizewinner seeds will all produce huge pumpkins, but Atlantic Giant has produced the world champion for the last 17 years. Personally, I like Prizewinner the best; it might not grow as large as Atlantic Giant, but its color, shape, and quality are far superior to all the other giant varieties.
Transplant your seedlings into the garden when the first true leaves appear or when roots start growing out of the peat pots, usually about two weeks after germination. Handle the starts with care because they are easily damaged at this stage in life. Place a mini-greenhouse over the newly transplanted seedlings for about six weeks to shelter them from frost and wind. An A-frame with a clear plastic or glass covering works well and is easy to construct. Or if you want instant results, use an Aquadome. They are similar to the wall-owater, but they hold up better and will generate some quick heat for faster growth. Once the seedlings outgrow the cold frame, use a temporary fence to block the wind for another 2-3 weeks.
Eight to ten weeks after germination, the first female flowers will appear (they are easy to detect as they have a small pumpkin at their base). If you want a good head start, you must hand pollinate the flowers. In the early morning, select a freshly opened male flower, pick it and remove the outer petals, exposing the fresh pollen. Then, locate a newly opened female flower and gently swab the internal parts of the flower with the pollen-laden stamen of the male flower. Once a pumpkin has set, it needs to be repositioned for optimal long-term growth. Usually the stem will grow at an acute angle, but you must gradually coax it (over about a weeks time) to be perpendicular to the vine.
By mid-July, you should have six to eight pumpkins per vine. Now you must choose the best and remove the rest; by removing all the other fruit, the choicest pumpkin will not have to compete for food and water. Usually, young pumpkins that are round and especially tall will grow the largest. Also, you should start pruning your vines to discourage random growth and an out-of-control patch. Prune each main vine when it reaches 10 to 12 feet beyond a set fruit and don’t let the side shoots grow longer than 8 feet before clipping the tips. Bury the ends of cut vines to reduce water loss.
Finally, you must fertilize your plants regularly. Most experts recommend applying a water-soluble food once or twice a week over the entire plant area. Start with a fertilizer that stresses phosphorus. We recommend Ferti-lome Blooming and Rooting Fertilizer (8-59-9) or Nutra-Green (5-10-5) for the biggest pumpkins. Both of these fertilizers have yielded exceptional results. After fruits have set, switch to a more balanced fertilizer, such as Ferti-lome Geranium and Hanging Basket Food (20-20-20) for about a month, then switch back to the Blooming and Rooting for the remainder of the season. Just remember that over fertilization can hurt more than help. Slow and steady will win the race.
Good luck, and most importantly, have fun growing the best pumpkin you can!

